This guide provides detailed instructions on how to add, use, and remove the Zoom integration within SubscriptionPro. It ensures users can seamlessly connect their Zoom accounts, manage subscriptions, and disconnect if needed.
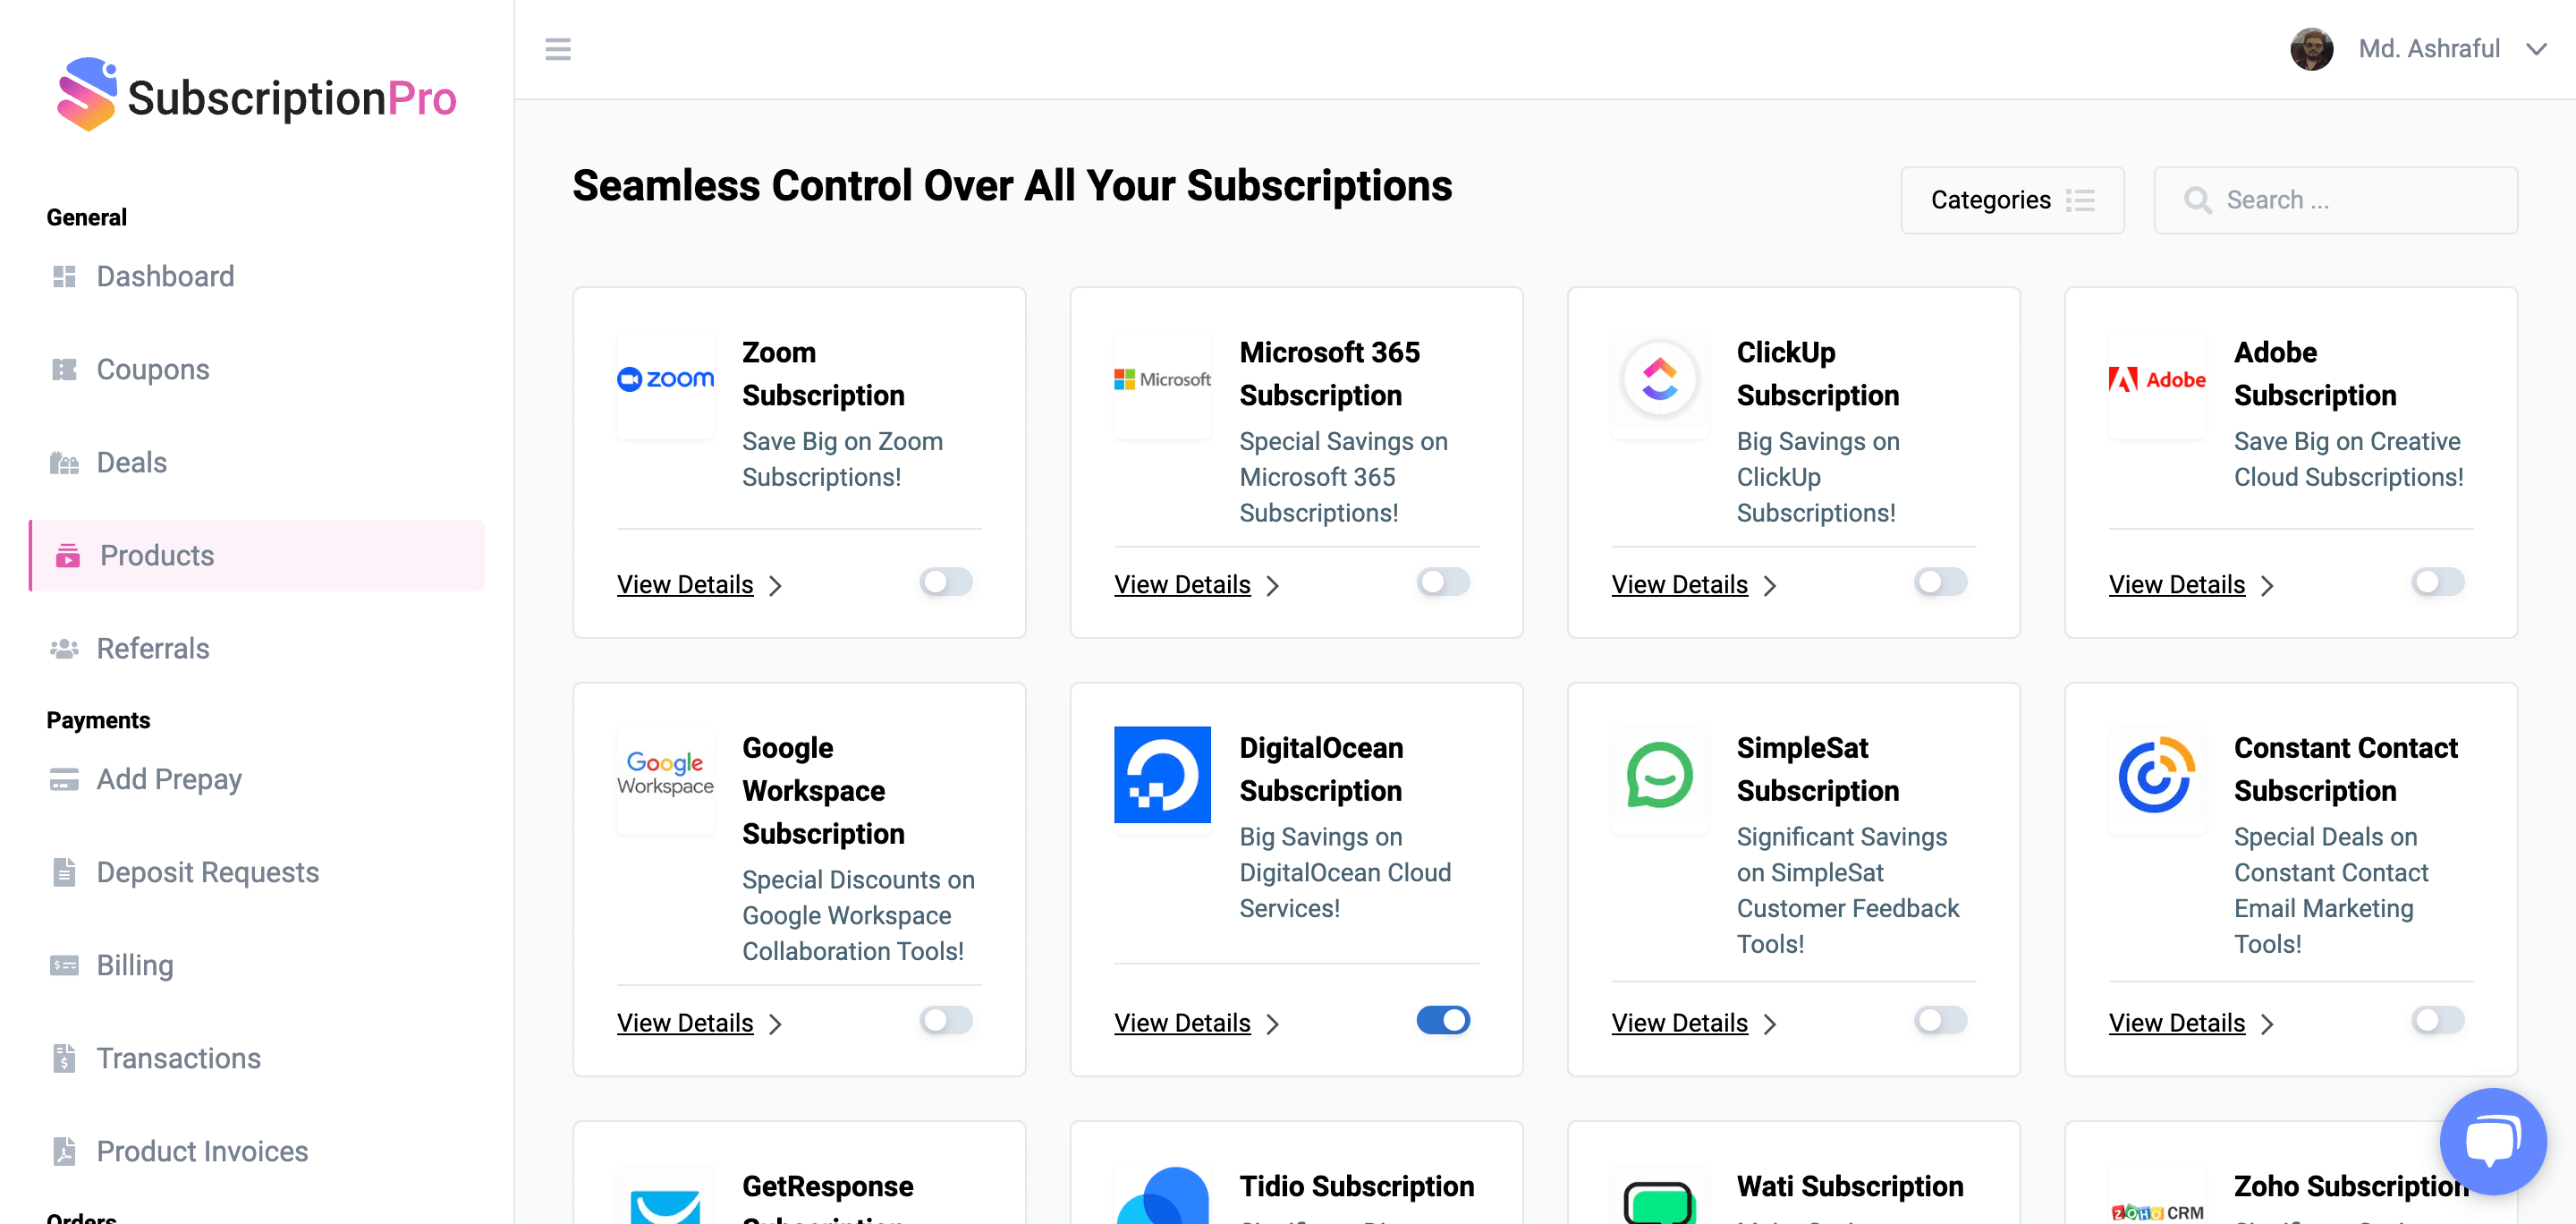
Once logged in, go to the Products menu from the dashboard.
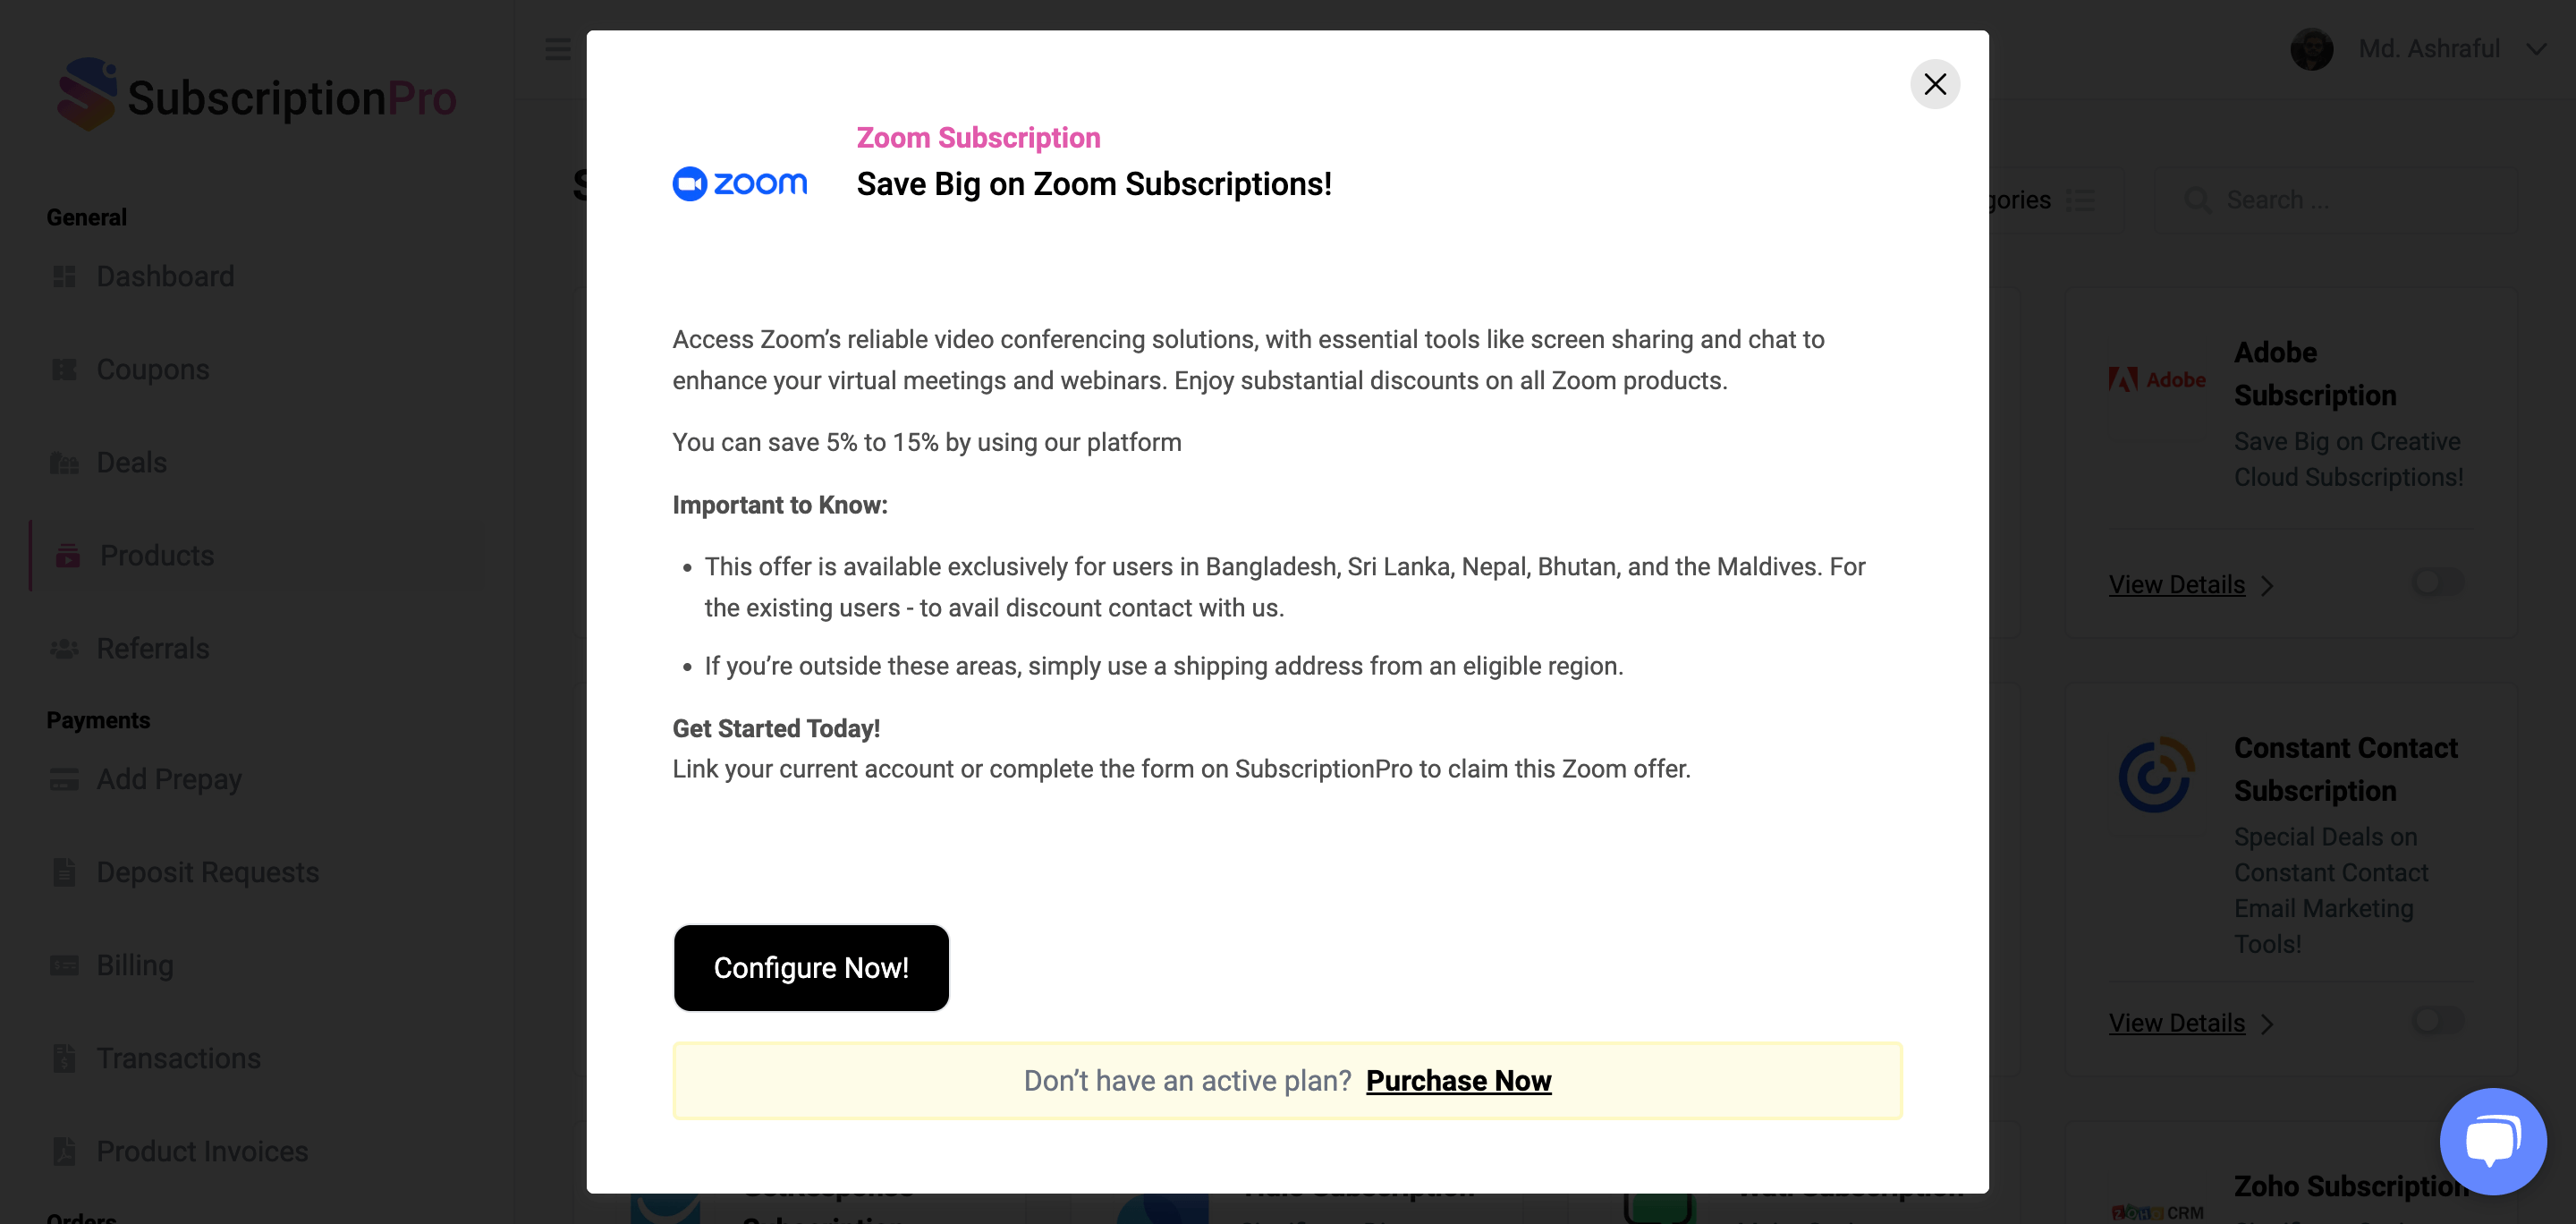
Initiate Zoom Connection. Click on the Zoom integration option. Click Connect Now to start the setup process.
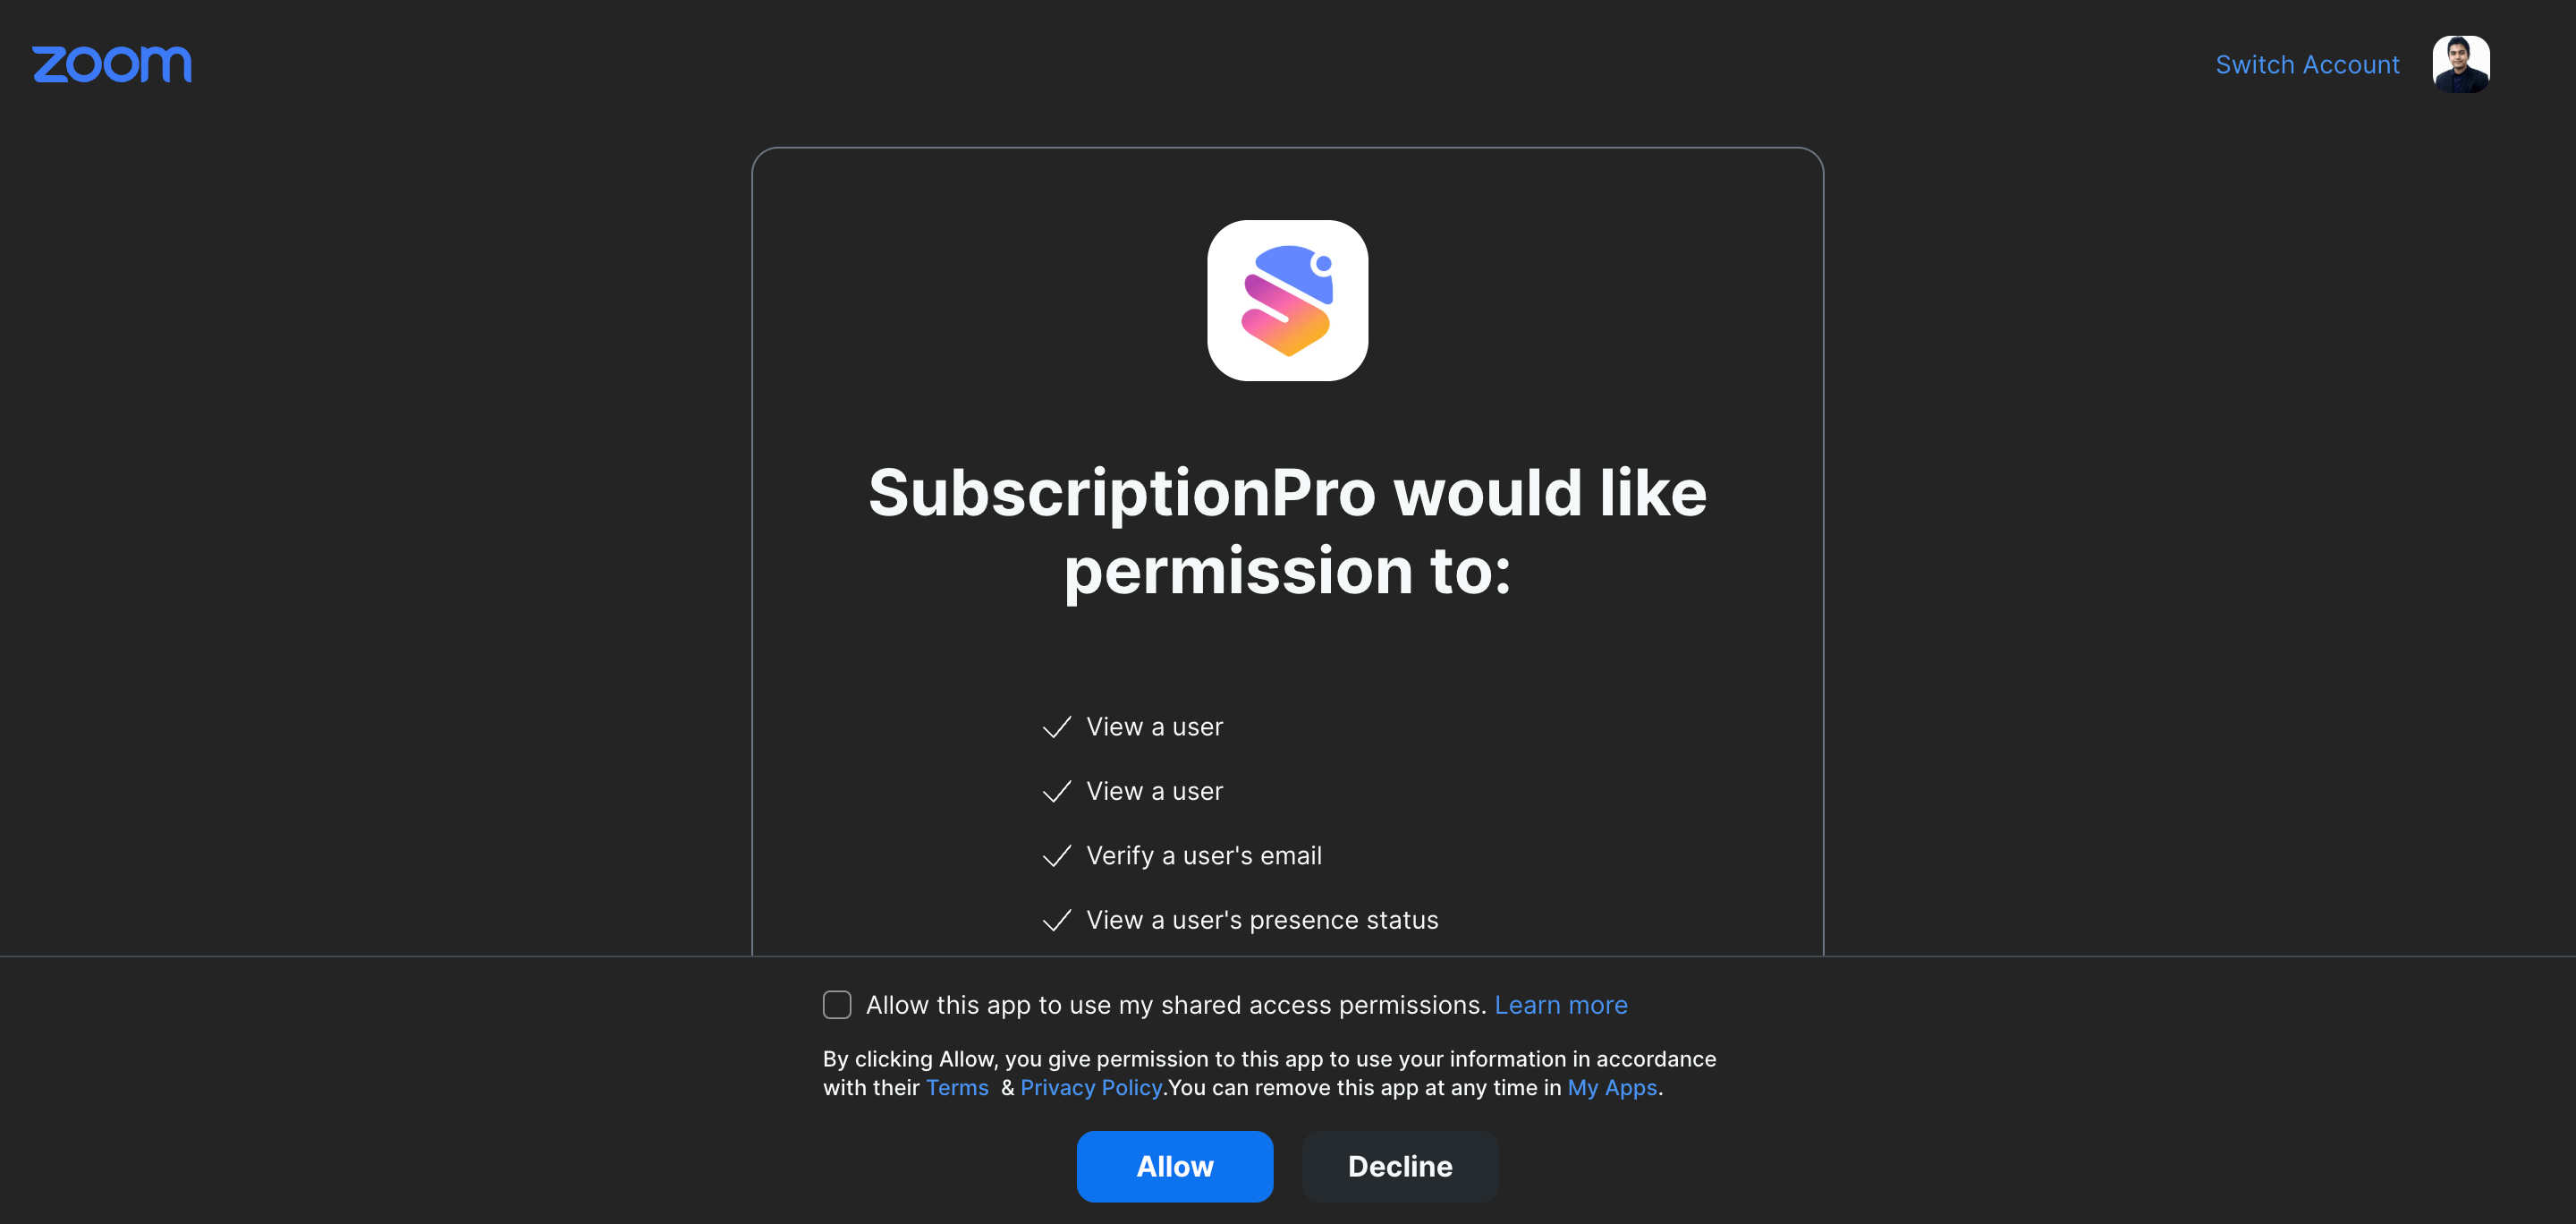
Authorize the Connection. Click the Configure button to initiate the OAuth flow. You will be redirected to Zoom’s Authorization page. Review the requested permissions and click Allow to authorize the connection.
Confirmation. After authorization, you will be redirected back to SubscriptionPro. The dashboard will display your Zoom account details, confirming the connection.
Using the Zoom Integration
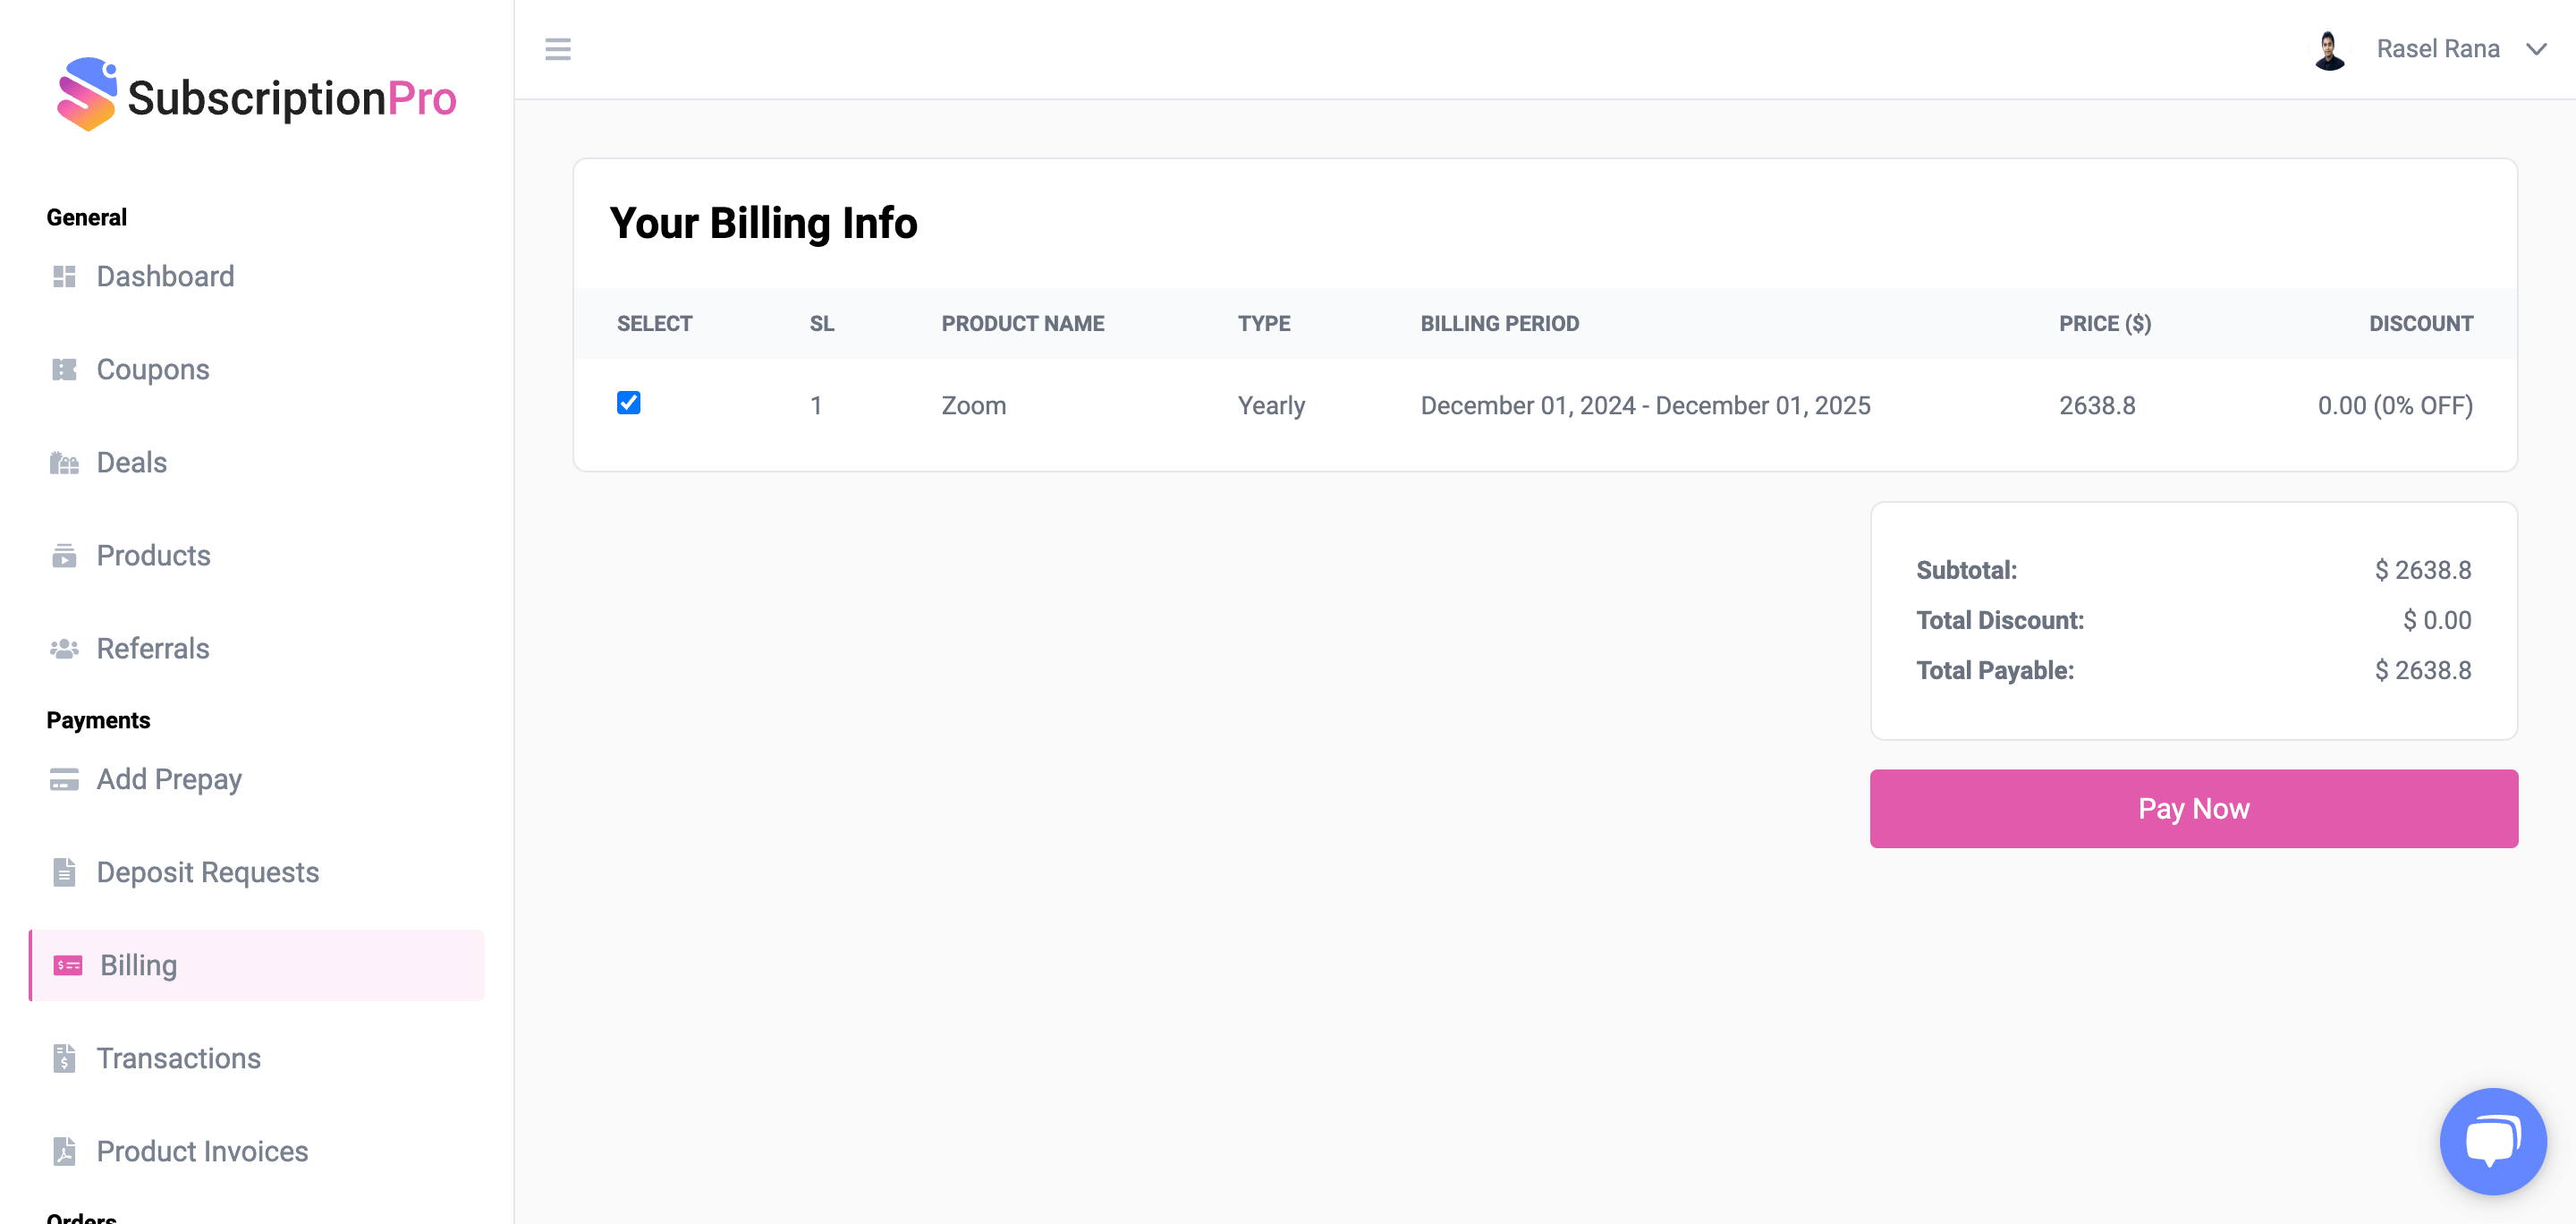
Manage Subscriptions. Navigate to the Subscriptions section. View details of your connected Zoom subscription, including plan type, renewal date, and billing information.
Renew or Modify Subscription. Select your Zoom subscription and choose options to renew, upgrade, or downgrade as needed.
Payment Workflow. Navigate to the Payments section to initiate payments for your Zoom subscriptions directly through SubscriptionPro.
Receive Notifications. Ensure you receive updates about subscription renewals, payment confirmations, or cancellations via email and the dashboard.
Removing the Zoom Integration
Navigate to Products menu.
Locate the Zoom integration and click on details button and then click Disconnect.
You Zoom account will be disconnected from SubscriptionPro.